skip to main |
skip to sidebar
 Sorrel is an easy, delicious plant to cultivate in your garden. It doesn't take much room and offers many possibilities for cooking from the kitchen garden. It faithfully returns every year without even being asked. Give it a little liquid fertilizer after true leaves appear and your rewards will be great.
Our clump of sorrel must be used soon--it's starting to bolt (go to seed). When herbaceous plants do this, they think they can retire for the season and form their seeds for next year. Snip off the seed shoots and the plant will continue for a while longer. Repeat if necessary.
Sorrel (Fr. oesille), also commonly known as sour grass or lemon grass, is a very hardy perennial herb that dates back to 300 B. C. and still grows wild in Asia, Europe, and North America. Local nurseries usually carry a few starter plants in early spring, or seeds may be ordered from seed catalogs that carry herbs and started indoors. Our two plants are at least ten years old. They are one of the very first plants to burst up through the snow in late winter. We love picking the leaves for sauce on poached salmon (see post February 4, 2010 for sauce), sorrel soup, and as an omelet filling (yes!)
Sorrel looks and acts a lot like spinach, but usually grows in a clump rather than rows. See photo.
Select unblemished leaves, pick and wash in cold water as carefully as you would wash spinach, and drain well. If leaves are mature, remove stems. Grasp a leaf in one hand, fold with stem side up, and "strip" or pull off the stem up the length of the leaf and discard. This trick can also be used on mature spinach leaves. It makes even a large leaf extremely tender.
After washing and stemming, chop leaves crosswise into 1 inch pieces.
QUICK SORREL SOUP
In a large sauce pan, wilt 1 pound (4 cups) chopped sorrel in 1 Tablespoon olive oil.
Add 2-3 cloves crushed garlic
Add 1 quart chicken or vegetable stock (a light colored stock). If soup appears too thick, add more stock. This is not a "thick" soup like bean or lentil.
Add 1 large bay leaf
Add 1 teaspoon salt
Add 1/2 teaspoon fine grind pepper
Simmer 30 minutes.
For immediate service, cool stock slightly and process in a food processor or use your hand blender right in the cooking pot. Never pour boiling liquids into your processor---hot liquid will splash and could burn you.
Return to pot if you used the processor and reheat if necessary.
Serve in flat soup bowls with a garnish of croutons, minced sweet onion, minced scallion, or a pinch of oregano dusted on top.
Contrast the beautiful green color with a tomato or raw red or yellow bell pepper salad.
Stay tuned for our "omelet primer".
Kitchen Garden Cook


 Unfinished business--here is a promised photo of "security" plants from last posting. Please note the R. Rugosa, shrub rose) in full bloom. This rugged plant serves many purposes, primarily hardiness in our climate plus the gift of hundreds of beautiful blossoms in June. It also offers thick thorns on every stem--animals and intruders will not venture across a patch of shrub roses. If you take the time to "dead head" spent blooms, a second flush is promised. We dead head patiently, enjoy the second flush, and then leave the hips to ripen and cheer the with colors varying from bright yellow orange to wine red. See January 4, 2010, post for a picture of rose hips in the snow. winter landscape. Bees love it.
Our summer picnic supper menu can be enjoyed any day. If guests want to "bring something" encourage them---you'll discover new recipes! We enjoyed cocktails and nibbles on the patio, but brought supper indoors due to a threat of rain.
An informal centerpiece was needed for the table, so a few cuttings of tarragon (now chest high in the garden), the remaining peonies, and some gold yarrow were free. Never hesitate to snip plant material from the yard if you have no time or inclination to buy commercial flowers. Low glass or ceramic containers from the kitchen cupboard stimulate creativity. We prefer low arrangements on the dining table so all guests are in full view for good conversation. We dried the extra tarragon (see post January 24, 2010).
MENU Plate of cheeses, crackers, nuts, olives, and grapes for pre-supper nibbles with our drinks. Grilled all beef franks and buns Potato Salad with vinaigrette dressing Black Bean "Poor Man's Caviar" or Succotash salad Green bean & Hearts of Palm Salad Sorbets and cookies for dessert Coffee & Iced Tea
Everybody knows how to do the noble hot dog---grill outside or boil on the kitchen stove top.
Follow package instructions.
We split open our buns, butter them, and run under the broiler for about 2 minutes for a light toast.
You may also "toast" yours on the barbecue grill if that's how you are doing the franks.
4th of July Potato Salad
4 pounds Yukon gold potatoes (any waxy, thin skinned potato will do -- no Russets please)
Wash potatoes if needed and DO NOT PEEL. If potatoes are different sizes, select same size for even cooking, or cut large ones in half for cooking. Cover with water in a large saucepan and gently boil about 30 minutes, depending on size. Test for doneness with a kitchen fork--they should just pierce through--DO NOT OVERCOOK or they will fall apart in your salad.
Drain off cooking water and immediately cover with COLD water to stop cooking. When cool, drain well and let potatoes air dry a bit so dressing is better absorbed.
Dice one large onion (white, yellow, red, or your favorite). Add to the potatoes before dressing.
Quarter potatoes unless they are already bite size. It is desirable to have an open cut on each piece of potato to absorb dressing flavors. Place in a salad bowl and toss with 1-2 teaspoons salt. Sprinkle with 1/4 cup dry white wine or dry Vermouth. Toss gently and let stand a few minutes.
Potato Salad Vinaigrette Dressing (for those who don't like Mayonnaise)
Place ingredients in a pint glass jar (with fitting lid):
1 cup olive oil (or canola)
3 Tablespoons cider vinegar (use more if you want a "German" style taste)
1 teaspoon Dijon style mustard
1/2 teaspoon salt
1/2 teaspoon ground white pepper (black OK)
SHAKE well, let stand a few minutes, and taste for salt. Add more if needed--potatoes need a lot of salt.
If you like "heat", add 1/8 teaspoon Wasabi powder or 1/8 teaspoon red or green chili powder for a unique twist.
Dress the salad at least an hour before service. Salad may be made a day ahead and refrigerated. Start with just enough dressing to coat potatoes--if you have extra, store it in the refrigerator in the pint jar and use on your next salad, potato or otherwise.
Black Bean "Poor Man's Caviar" or "Succotash" Salad
The term "succotash" comes from the New England native American word for boiled corn kernels msickquatash. It is a food dish consisting mainly of corn and lima beans or other shell beans.
Succotash became popular during the Depression because it was inexpensive and made from readily available ingredients. Now we are interested in returning to use of local products so these simple ingredients enjoy a new vogue. There are many regional variations.
Combine the following ingredients in a salad bowl:
2 cups cooked and drained black beans (canned or pinto OK)
2 cups cooked and drained tender corn kernels (canned OK, or boil ears and cut off kernels)
1 large onion (any color) finely diced
2-3 cloves fresh garlic, pressed and scraped into bowl
Optional:
1 large cucumber, peeled and diced and/or
3 ribs young celery, diced
Dressing
1/3 cup vegetable oil (canola)
1/3 cup cider vinegar
1/3 cup white sugar
Heat if in a hurry to dissolve sugar. Let cool.
Add 1 teaspoon salt
Add 1/4 teaspoon chipotle or other red chili powder
Add juice of one lime
Shake or mix and dress salad.
Best if made one day ahead and refrigerated until service.
At service, top portions with fresh chopped cilantro.
Happy picnicking!
Kitchen Garden Cook


 When the gorgeous high desert yucca (Fam. Agavaceae) blooms it reminds me of my childhood hikes taken with my botanist Dad in the dry country of south central Montana. He loved native plants and knew the botanical names of every one in our region. Yucca grows all over the North American continent. It is considered a pest by some, but it is a hardy plant that is interesting in the landscape at every season.
It is also a "security" plant. In our yard it tops a 4' rock embankment in the front yard, and keeps pets and children from jumping off the rocks and possibly being injured. Along with the equally valuable shrub rose (R. rugosa) which grows profusely in the extremes of the Montana climate, yucca makes a dramatic border. Plant either under your home's windows and your worries about burglars will be greatly reduced! Stay tuned for shrub rose pictures--blooms are just popping out in the perennial beds.
Grape Arbor Tip:
We have a lovely grape arbor to remind us of our years in California. The arbor is of similar design, but the varieties of grapes grown are selected for this northern climate. Remember, there were grapes growing in Greenland (Vinland) in the days of Viking exploration. We grow the native Beta, Concord (Standard American slipskin), Bluebell, and Himrod seedless. They are all "northern" varieties. Robins love grapes. Raccoons love grapes. It's a challenge once the arbor is discovered. Early this spring we had a robin nest on one vine trunk and we allowed that hatch to fledge. But once the vines leaf out, mama bird has to find a new location.
Our bird proofing trick is clipping old CDs to the branches with clothes pins. The reflections scare them away -- usually to the choke cherry bushes next door. The CDs may also be tied on with string, and when they blow about it works even better.
Ideas for rebuffing raccoons are welcome. These critters vault right over our 6' fence without hesitation once the grapes are ripe. Please write! Raccoons are just too smart for anything except cages of chicken wire around the grapes. We don't much like the looks of that.....
Kitchen Garden Cook


 Ruth Hveem Kronmiller, aged 95 years and 7 months,
peacefully left this life on June 12, 2010.
She was a daughter of farmers from Norway who settled in the
Upper Missouri region of northeast Montana.
The challenges of the High Plains were well known to her.
All who grow up on the farms and ranches of the plains are familiar
with the crushing tedium of women's lives--sisters, daughters, mothers, grandmothers.
Women were heroic through their endurance alone.
Mom was a great organic gardener. My tomatoes will never match hers.
My thumb is not yet so green.
One of Mom's favorite lines was written by Jill Ker Conway in her Australian memoir,
"The Road to Coorain:"
"When my end comes--wherever I am, my dust will mingle with the red dust of the western plains.
It will blow about and get in people's eyes--and I'll be content with that."
Mother, rest in peace.
With thanksgiving for many years with her,
Kitchen Garden Cook
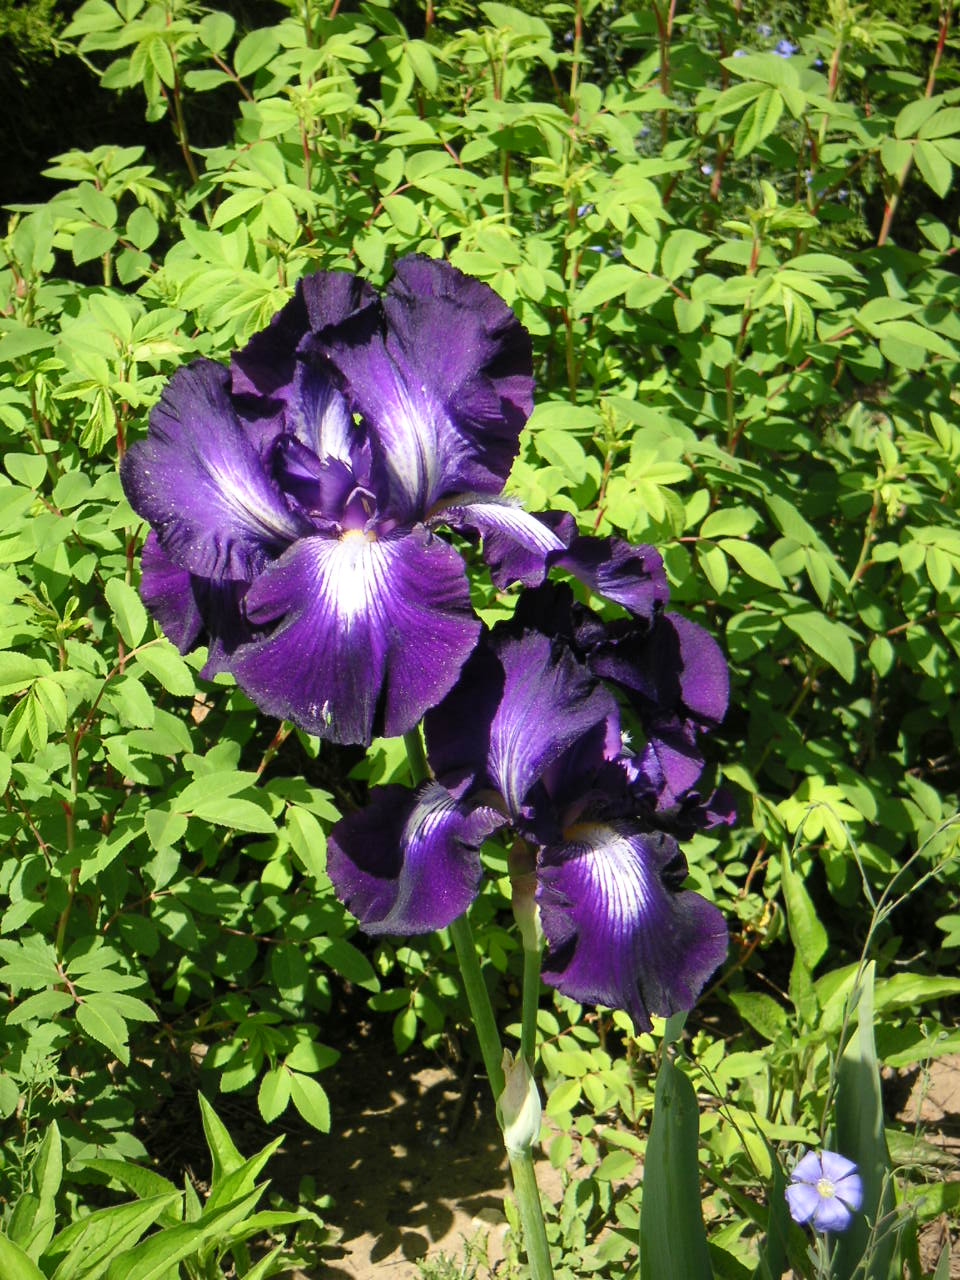
Photos are her favorite flowers--iris, peony, flax


 At last! Warm enough weather in the high plains to set out those patient tomato plants. I am fortunate to have a "resident planter" in house who performs this task beautifully.
John's recipe for success:
1) Be sure the weather is stable enough--no more frosty nights expected.
2) Spade plot a few days ahead of planting if possible, and rake level.
3) Make a hole with hand digger, mix 1 tablespoon 16-16-16 granulated fertilizer to soil per plant.
4) Gently remove plant from its container and set in deeply -- up to first pair of leaves if possible.
5) Fill in handfuls of soil and compact evenly around plant.
6) Water in, but don't drown it first day.
7) Surround seedling with a hoop or cage or stake--your preference.
8) If weather turns cold, cover hoop or cage with a leaf bag and fasten with a clothespin. This trick has saved our tomatoes many many times from that sudden cold snap or harsh wind. If it is suddenly very hot, pin white flour sack dish towels or old pieces of sheets across the hoop to shade them until they are well established. Watch "The Godfather" movies--the Sicilians always shaded their tomato plants from the hot Mediterranean sun.
First week or so, check for watering needs daily. Plan to baby them a little!
We planted Romas, Lemon Boys, Sweet 100s, Husky Gold, Black Master, Amana, Sun Sugar, and Beefmasters this season. Some are old favorites and some new. I love gold and yellow tomatoes, so always have several plants. My seed starts did poorly this year in the house, so I ended up buying most plants from established local nurseries.
We also replaced two grape vines in our arbor this year. One is "Bluebell" which originated at the University of Minnesota, and the other a good old Concord--toughest grape on the planet. Can't wait to pick the grapes.
Suggestion: If you are planting your first garden, or have not had success in the past, seek advice from a good local nursery and/or your county extension agent. Each zone has many different challenges--from aphids to deer to weeds to weather--and soil conditions widely vary. Plant vegetables (and flowers, too) that are climate suitable for your micro climate.
Share your results with our readers!
Perennial photos: Early iris, ground cover (dianthus and flowering thyme) in peony bed, dianthus near red gravel path, snow-in-summer patio border, and blue flax (a great blue color for those who love blue in the garden).
Kitchen Garden Cook
KGC
As promised on Memorial Day, here is my "Lazy Daze" Pepper Steak.
This recipe won the Montana Beef Council Cook-off March 22, 1997 (!!). It seems like it was just the other day that we were competing in this contest. Time flies. I did not advance to Nationals, but have shared this "rub" technique with many friends. Give it a try--it's easy and goes well with rhubarb pie or any seasonal dessert. Use your favorite cut of steak or chop (lamb and pork work well, too).
"Lazy Daze" Pepper Steak
1 top boneless sirloin or rib steak minimum of 1 1/2 inches thick. 2" is better.
(weight about 1 1/2 pounds to serve 4, depending on appetites)
1 tablespoon vegetable oil
3-4 cloves fresh garlic (peeled and flattened or crushed)
Combine for Seasoning Rub:
1 Tablespoon black pepper corns or coarsely ground black pepper, crushed in blender or with mortar and pestle (hard work!)
1 tsp. salt
1 tsp., or 2 sprigs, dried rosemary, crumbled or rubbed between palms of the hand
1 tsp., or 2 sprigs, dried thyme leaves "
1 tsp., or 2 sprigs, dried sage leaves "
If you don't have your own dried herbs (see post January 24, 2010) to rub or crumble, you may substitute store bought, but be sure they aren't too old to have any fragrance. Make seasonings pass the sniff test. No aroma, no flavor.
Whirl the pepper corns in a blender until just broken up--you want coarse for this. Add the dried herbs and whirl or pulse a few more seconds. When the dust settles, dump into a small bowl or container and set aside. If you are rubbing the herbs, don't blend. Just add to the pepper.
Procedure:
Rub the steak on both sides with the crushed fresh garlic. Discard garlic, or toss on the coals before grilling. Lightly brush on just enough cooking oil so that the herb rub will stick.
Pat the herb and pepper mixture evenly on both sides of the meat. Let stand for at least 15 minutes before grilling. You may prepare the meat to this point, wrap in plastic wrap and refrigerate up to 24 hours if desired. The longer the "marinade" time the better the flavor. Please bring meat up to room temperature (about 30 minutes on the counter) before grilling. If you grill ice cold meat, adjust your time accordingly. It will take much longer.
Grill 1 1/2" thick boneless top sirloin steak 22 - 26 minutes over medium coals or gas, turning once, for medium doneness. Review instructions with your individual equipment. The Department of Agriculture (USDA) recommends 145 degrees F inner temperature reading for "medium rare" beef, and 160 degrees F for "medium." For individual portion steaks or chops, reduce grilling time to 8 - 10 minutes, depending on your grill and desired doneness. The USDA and other online sites have many charts for meat cooking times if you need further information.
When finished, remove from grill (or skillet), keep warm with a foil tent, and rest a few minutes before slicing. The top sirloin is to be sliced at an angle, across the grain, into 1/4" slices for service. Meat should be juicy. Add a few pats of butter on top before slicing if you have overcooked meat and it is dry.
Present on warm plates with your choice of accompaniments. Potato wedges are good and may be seasoned with the rub and cooked on the grill along with the steak. See post March 6, 2010, for more potato ideas.
Add a tossed salad, crusty bread, and some red wine and you have a feast.
Get grilling!
KGC



 Rhubarb (genus: Rheum x hybridum or cultorum)
is one of the earliest plants to burst forth from the cold soil in early spring.
Its impressive leaves and colorful red or green stalks grow quickly.
The stalks are pulled and sliced for delicious pies and sauces.
Rhubarb has experienced a renaissance in recent years as a sauce for game and various vegetables in upscale restaurants, but its reputation as a "pie plant" is the most widely known. Isolated farmers and ranchers in the high plains appreciated rhubarb as an early "fruit" for pies and desserts, even though the plant is a vegetable by botanic classification.
Pull the stalks, don't break them off. After "pulling" for a pie, I give my plants a nice dose of liquid fertilizer to boost growth for more pies. You may also purchase rhubarb in the market.
My favorite rhubarb pie is simply rhubarb + sugar + a pinch of anise (or ginger for variation), and of course, a wonderful crust. No strawberries to interfere with the pure taste here!
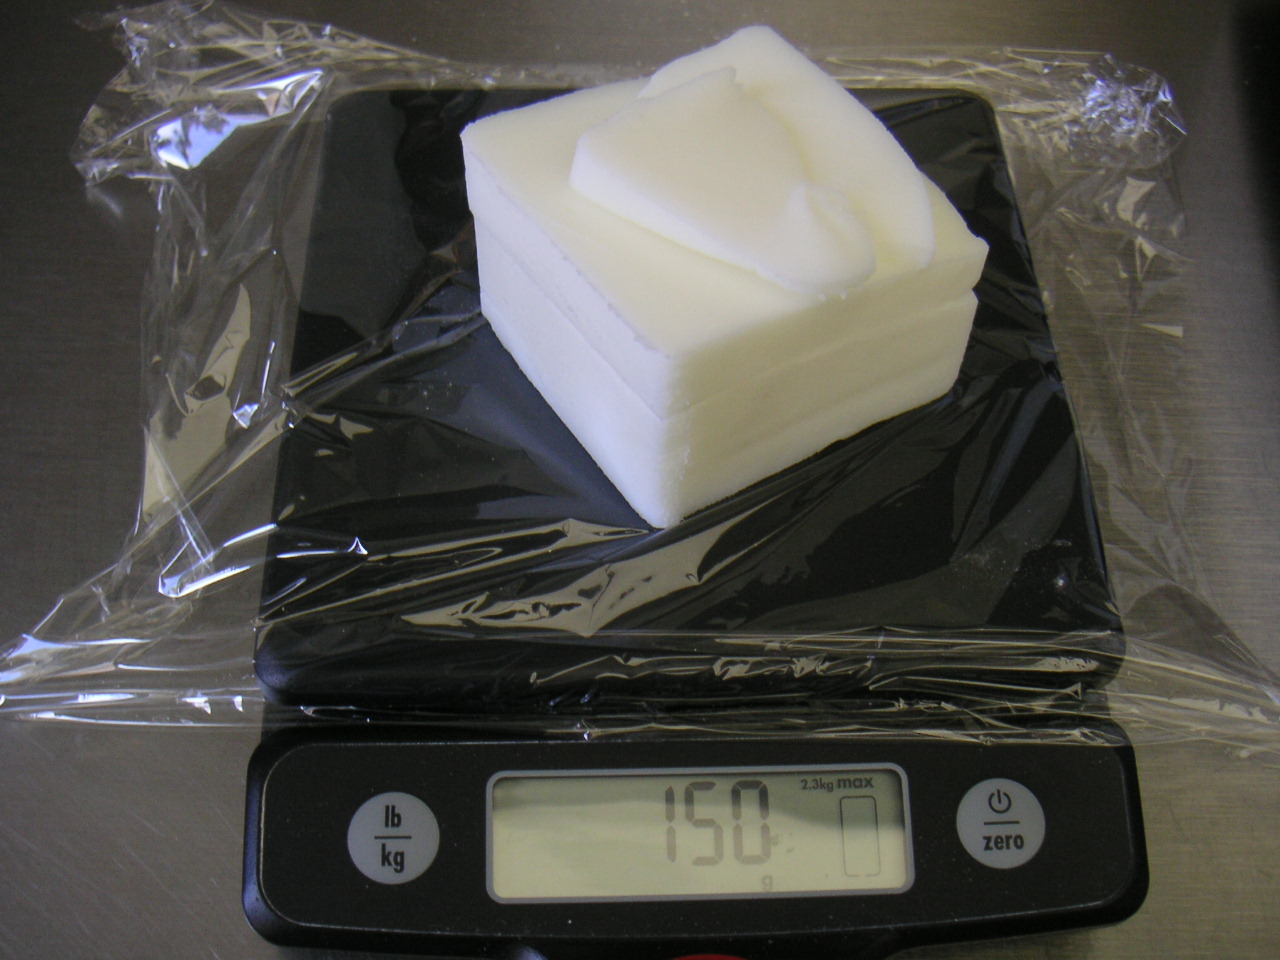
My crust is a lard crust. Ingredients are weighed on the kitchen scale. I cannot convert dry measures from weight to "cups" and guarantee that the final result will be satisfactory. If you do not weigh your pastry ingredients, please use your own favorite pie crust recipe. If I could encourage one kitchen technique that pays unimaginable benefits to the home cook, it would be the weighing of ingredients. Simple, accurate, saves dish washing, etc.
Kitchen Garden Cook's Pie Crust is mixed in the food processor. It can be done by hand on a floured board if you don't have a processor. This makes a double crust 9" pie.
Put into processor:
300 grams all purpose flour
150 grams lard (the solid kind, not the soft bucket kind) cut into pieces
1 teaspoon salt
1 tablespoon sugar
Pulse until lard disappears and mixture is a coarse meal.
Add 1/4 cup COLD water and pulse 5 or 6 times.
If dough is still dry and a big pinch of it will not hold together, add a few more DROPS of cold water, pulse once or twice, and check again. Don't process until it forms a ball--too much. Too wet dough will be tough after baking. It should just hold together.
Dump dough into a wide mouth bowl, push it away from you a few times with the heel of your hand (see photo) and "gather" it with a plastic scraper if you have one. Pat into a hockey puck shape, wrap in plastic wrap or parchment paper and chill at least 30 minutes.
Rolling crust:
Roll with a floured wooden pin on a sheet of parchment paper--placed long way toward you, with a little overhang at the counter edge. Lean against this overhang and the paper will stay still. I roll the whole piece of dough at once, to the thickness I like, and trim off the extra using the pie pan as a guide (see photo). Stack the remaining rolled dough (see photo) and roll out again for the upper crust. Flaky pastry is the goal--if you wad scraps up into a ball, it won't be as flaky as the stacking technique. Cut a hole in the middle with a biscuit cutter or cookie cutter for steam to escape. The traditional lattice strips may also be used (more work). Cover filling with top crust and crimp edges together.
Rhubarb Filling for 9-inch pie
2 pounds fresh rhubarb (4 generous cups) cut into 1/2 inch pieces
(If stalks are very large, split lengthwise before slicing into pieces)
1 cup white sugar
1/2 cup brown sugar
pinch salt
1/2 teaspoon powdered anise
(Other spices such as ginger or cardamon may be substituted for anise, but try anise first)
Toss all together and let stand about 30 minutes for fruit to "juice up" before filling crust.
If 10" pie is desired, add 2 more cups rhubarb and 1/2 cup additional sugar. Sugar amount depends on your taste for sweetness. If rhubarb seems dry after standing 30 minutes, add a tablespoon or two of orange juice or lemon juice to moisten. On the other hand, if it is too juicy, sprinkle 1/4 cup flour over the fruit and toss with a fork. It will thicken it during baking.
Baking:
Place a drip catching steel plaque or pizza pan under your pie dish when you turn on the oven. Pie will bake more evenly if the plaque or sheet is heated with the oven.
Bake in a pre-heated 400 degree F oven for 15 minutes. Then turn down oven to 350 F and continue baking for about 40 minutes, until crust is nicely browned and filling bubbling. Let rest until cool enough to cut.
Enjoy!
Kitchen Garden Cook