skip to main |
skip to sidebar

 We have a wonderful neighbor with cherry trees. Cherries make delicious summer treats!
Please go to this blog archive and click on August 24, 2010, for a picture of the tree (and more recipes).
This year the cherries that were shared with us went into the jam pot--same great flavor without making crust.....
Jam is almost foolproof. It doesn't have to "jell" like jelly. Any summer berry or soft fruit will do, but we are working with cherries today because they were just acquired locally.
Procedure
Review canning procedures as per instructions on packages of lids, rings, and pectins, or in a reliable cook book.
Prepare small jars (one cup size (8 ounces) is my favorite, but pint jars OK) by standard sterilization for canning procedures. Boil clean jars in water to cover for at least 3 minutes. Remove and drain on a clean dish towel (on a tray for added convenience) and drop NEW lids and rings in the hot water until ready to use. Rings can be re-used. Jam mixture and jars must be HOT to get a proper seal.
The French make fruit jams when fruit is at its peak. This is ideal---don't waste the sugar or your precious time if the ingredients are not fully ripe. In fact, I have purchased baskets of apricots about to be discarded at fruit stands that were overripe for eating out of hand. They were my most delicious result.
I like the French "confiture" method, which simply takes equal amounts of fruit and sugar (cup for cup) and macerates (soaks) them in a glass or ceramic pan overnight (12 hours). If you are doing a big batch (more than 4 cups fruit), alternate layers of fruit and sugar, ending on top with sugar.
Macerating draws out the juices. Cherries will soften and a thick syrup will form.
Start with 4 cups fruit and 4 cups real white granulated sugar. If fruit is exceptionally sour, add more sugar.
When time is up, drain cherries in a kitchen strainer over a heavy sauce pot. When thoroughly drained (press on them a bit if necessary to extract all juice possible), dump cherries onto a cutting board and chop coarsely (see photo).
Bring syrup to a simmer and cook about 7 minutes. Syrup should be clear. Add cherries and cook 8 - 10 minutes more.
Optional: If you want a thicker mix than cooking alone has made, add 1 packet of liquid pectin for about 4 cups jam (see pectin instructions for accurate proportion and stirring procedure. It's easy.)
Optional: If you don't have pectin or don't want to use it, be sure to cook "syrup" to the firm ball stage (239 - 244 F) and then add the fruit and continue cooking about 8 - 10 more minutes. It should be thick enough for use on toast, etc.
KGC


 Our shrub of thyme has flowered and was ready for harvest. The plant offers a lovely corner ground cover for the vegetable garden with its tiny blue violet flowers and then gives us a season's worth for cooking and gifts. Please refer to this blog's posting, January 24, 2010, for a more detailed primer on harvesting, drying and storing various herbs.
Common culinary thyme, THYMUS vulagris, has at least a thousand uses--from seasoning meat dishes, soups, stews, game bird rubs, pasta sauces, and so forth. Don't overlook the French trick of adding a scant tablespoon to your nut bar crusts or fruit pie crusts--a mysterious element that gets everyone's attention. Also try a vanilla ice or sorbet with thyme flowers. I fondly recall the gorgeous flavor at the multi-star restaurant in St. Paul de Vence (France) where we first tasted desserts with thyme--the icy sorbet with thyme on a hot day was a memorable finish to a most memorable lunch.
Procedure
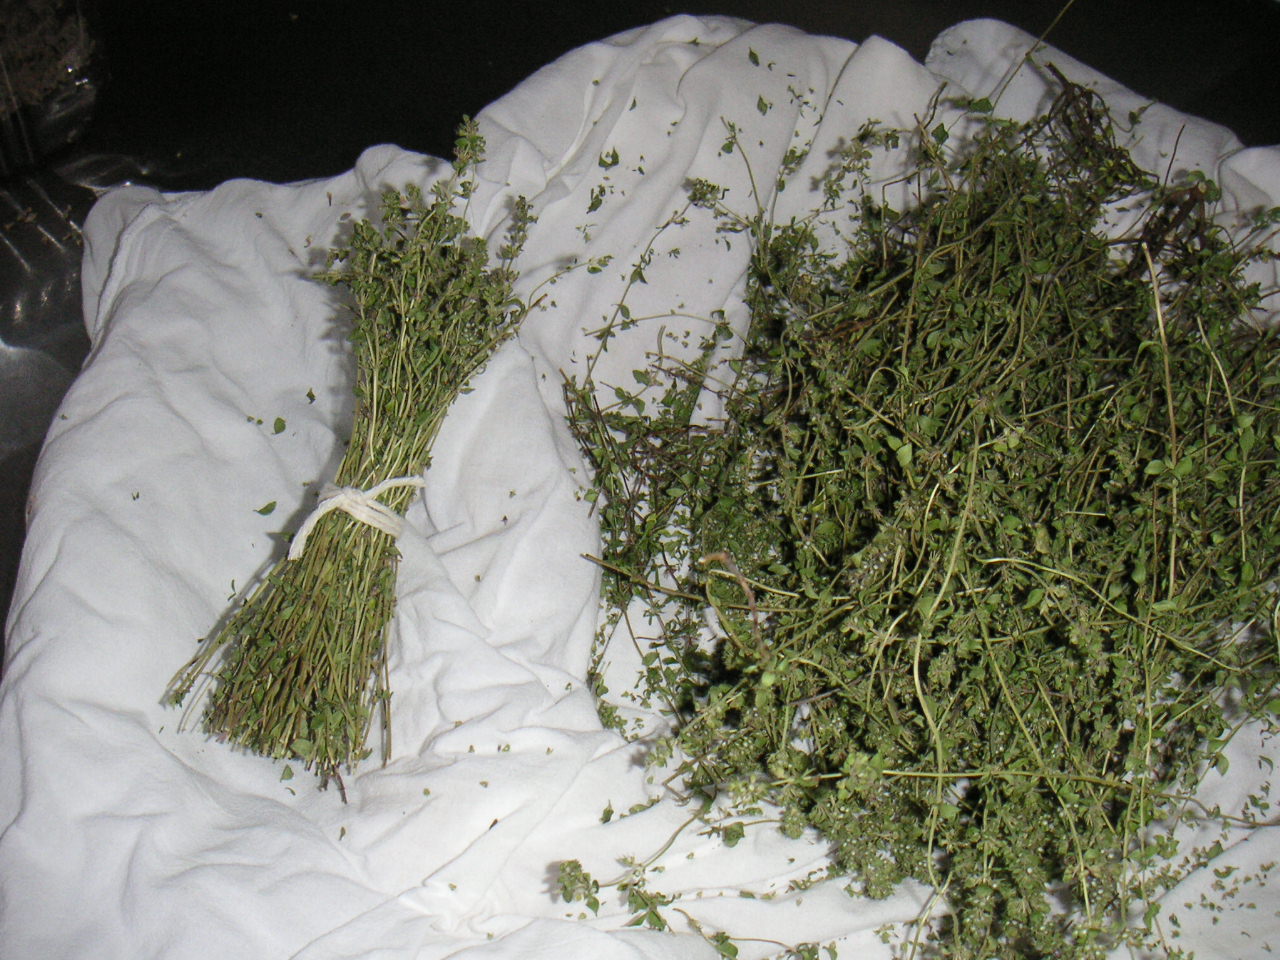
Cut your herbs, leaving about 2 inches to regrow. Separate loosely and dry in a dust free place on a clean dishtowel out of direct sunlight.
When completely dry ( 3-10 days depending on your climate's humidity) select stems and bundle (see photo). Southern European cooks keep a bundle by the stove and rub the dry leaves right into the sauce pot.
If you don't want to bother with tying, rub the whole pile between the palms of your hands over parchment paper or other clean paper, discard the stems and collect the tiny leaves in glass bottles for storage. Label and date.
Either method creates great gifts if you have more than you need.
And the workspace smells heavenly....
KGC


 A bulb of garlic has been likened to a rose in bloom---restaurants have taken the name, and poems have been written. Who doesn't love this noble herb? Who ever has enough of it?
Genus Liliaceae. Family Allium. Many edibles are included in the family--garlic, chives, leeks, and various onions are commonly known, loved, and heavily used in cooking all over the world.
We have grown our own in Montana--they are the best imaginable--sweet, juicy, and no inner sprouting. But it's too early for our crop, so a bag of garlic was purchased for roasting chickens
and I set aside 7 extra heads to prepare this recipe.
Roasting garlic is one of the most satisfying things to do in the kitchen. You cannot have too much of the resulting delicious paste. It's a kitchen staple. The commercially processed paste in the grocery store is expensive and doesn't measure up for flavor. You will never use powdered garlic again.
Technique
Use a glass or ceramic oven proof dish with a lid if possible. No lid? Cover tightly with aluminum foil. The glass casserole pictured is "vintage" and allows you to see what's going on as it bakes in the oven. You can find these extremely useful Pyrex type baking dishes at the second hand store (or in your mother's cupboard--as I did).
Pre-heat the oven to 375 F. Use the middle rack.
See how many heads of garlic fill your dish. Then cut off the top quarter of the heads so they will open during cooking. DO NOT THROW the cuttings away! Save in a small custard cup or ramekin (see photo) and bake along with the main casserole. They take about half the time. As soon as you take them out of the oven, you will be sucking the little bits out of their peels and licking your fingers. This is the cook's treat while doing other tasks. Save the trimmings and press through a tea strainer and use the garlic flavored oil. ( I love wiping out the ramekin with a hard boiled egg. Yes!)
After trimming, replace heads in the baking dish, pour over about 1/4 cup good olive oil (or a little more) and salt and pepper the cut heads. I use white pepper because the garlic is white but black is fine if you don't mind the dark specks.
Cover tightly, place in the oven for 30 minutes. Remove dish from the oven, turn heads over with tongs or a spoon and roast another 15 minutes upside down, and then return to right side up for final 15 minutes. This reversal is an easy way to baste the cut ends and keep them from drying out. Optional. But well worth it.
A toothpick is a good tester for doneness--you want soft cloves because when cooled, you are going to grasp each head and squeeze the creamy garlic out for use. When done, the cloves also start to "pop up" and the edges look caramelized.
Heads keep about a week in the refrigerator if you don't plan to use them all at once.
To use, pick up a clove in your hand and squeeze the pastel into a small bowl, pressing out every drop. Add the baking oil from the bottom of the casserole and mix it in with a fork.
There are a million uses in addition to just squeezing the paste on crusty bread and eating.
Use straight for a sandwich spread, add the oil to make a dip, or mix with cream or tomato puree, or any vegetable puree, and make a pasta sauce. Another idea--paint it on your pizza dough before adding tomatoes and cheese. A divine secret ingredient. If your friends don't mind getting garlic on their fingers, set a plate of roast garlic on the buffet or cocktail table and let them squeeze their own....
KGC
Thanks to Michael Chiarello, the great chef at Tra Vigne in St. Helena, California, for the basis of this technique. We have enjoyed many many fabulous dishes at the restaurant which features seasonal specialties from the wine region.