


Continuing with our focus on the bounty of fall fruits right in the neighborhood, we picked grapes last weekend and canned the lovely juice. The grapes are so sweet this year that adding sugar is not necessary. It was a social event to pick them on a hot September afternoon.
Lovely jelly can also be made from the grape juice and if you are interested in jelly, please refer to your county extension service or the instruction inserts in fruit pectin packages sold in the canning supplies aisle at your market. Cookbooks such as "Joy of Cooking" also give detailed steps for canning and preserving many kinds of fruits. Most of us do not have the time or fresh produce to "put up" our winter supplies--it's far more practical to buy them already done. However, the abundance of fruits available for the picking always tempts me to do it once more.
If sweet apples become available soon, I will post making juice in a French technique taught to me by a French rancher in our area. Stay tuned.
GRAPE JUICE
First: arrive at the arbor with your clippers, 5-gallon pails, and a sturdy ladder. After filling your pails, store in a cool place (away from birds and raccoons), overnight if necessary.
Prepare your kitchen canning station. You will need a large colander or wire strainer, your biggest stock pot or kettle, something to crush grapes as they cook -- a potato masher works well-- cheese cloth or thin pieces of worn cotton cloth to line the straining colander, and another basin or large pot to catch juice as you strain the seeds and stems. Mitten style pot holders and large spoons are also necessary. Once the cooking down process starts, you won't want to be searching for gear.
Second: thoroughly wash grapes under running cold water to remove any dirt, little insects, etc., This may be done outside with the garden hose if your sink is small. It is not necessary to remove grapes from stems. Wine grape harvesters crush everything at once, remember.
Third: fill your stock pot(s) about 2/3 full with washed grapes. Cover with cold water (maybe over- cover an inch or so), and bring to a boil. Once boiling, reduce heat and simmer for about 30 minutes. I use a large commercial potato masher a couple of times while cooking to release more juice. When cooked, turn off heat, cover pots and let cool until juice can be safely handled. I usually cook the first day after picking, cover, and let sit overnight.
Fourth: when cooled, carefully pour juice through a colander or wire basket lined with a couple layers of cheese cloth (rinse the cheese cloth before use to remove sizing--it might leave a little taste that you don't want) and catch it in a basin. Rinse the cooking pot and return the juice to it for further boiling. Lift the stems and seeds caught in the cheese cloth and squeeze out all the extra. Discard stems and seeds and reline colander if you have more batches. I don't reuse the cheese cloth, but you may. .
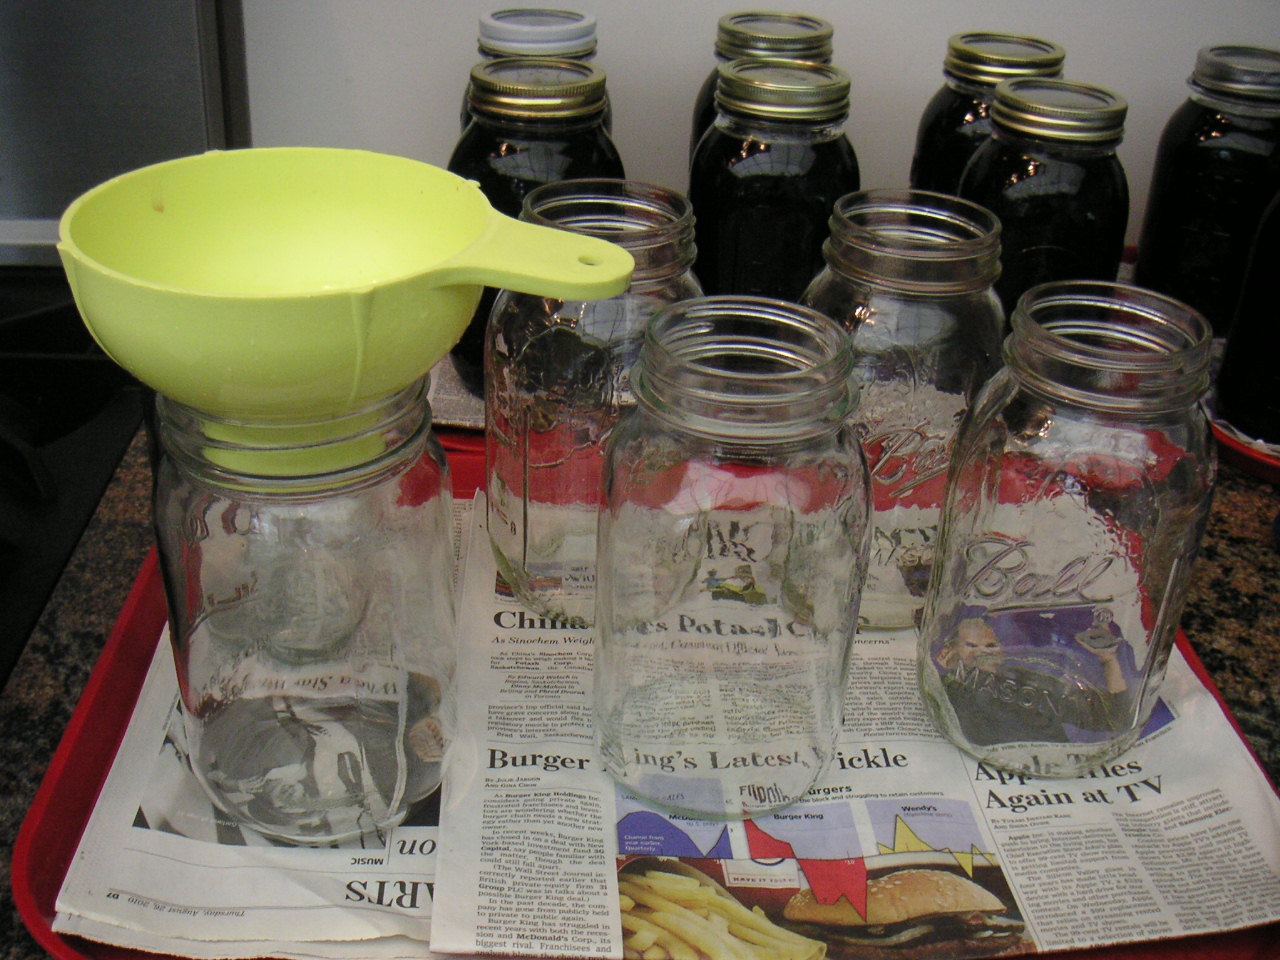
Jar Preparation: I wash my "Mason" style* quart canning jars in the dishwasher and immediately set them on a tray and put them in the oven at 225 degrees F to stay hot until filling with juice. Jars must be scrupulously clean and HOT for canning process.
Prepare lids by heating in a small pan of water and keeping them hot. If you are reusing your rings, be sure they are washed and clean. Use tongs to lift out lids.
Fifth: Boil the strained juice for 10 minutes and fill jars. Before finishing the boiling, taste the juice. If you desire a more intense taste, continue to boil and reduce (excess water evaporates and you get greater flavor). If you desire sweeter juice, start with adding 1 cup of granulated sugar to the pot for each 4 quarts juice. Bring to a boil again and be sure sugar is completely dissolved. Our Concords, Betas (reds), and Briannes (whites) rarely need to be sweetened. You can always sweeten the juice later when you serve the juice.
Please refer to reliable reference material for filling and sealing jars. This step is extremely important for food safety. There is little risk in canning fruit juice, but nevertheless, shortcuts should not be taken.
Sixth: Using a wide funnel and a pint glass measuring cup, fill 3 jars at a time. With a scrupulously clean dishcloth, wipe rim of each jar (dip it in the hot water you are holding for the lids) and top with a lid. Screw on a ring and set jar aside until you hear the pop of its seal. Because I use oven hot sterilized jars, hot lids, and boiling juice, I do not additionally process. Follow your equipment and manufacturer's recommendations. Repeat process until all hot juice is used. If you have juice left over, but not enough for a full jar, put it in a glass or pitcher and refrigerate and enjoy soon!
Final step: Check lids for sealing--if a lid has flexibility in its "dome" when pressed with your finger, it is not sealed. Refrigerate and use as you would a refrigerated juice. For sealed jars, wipe jars to remove any stickiness and store in a cool place (wine cellars ideal).
*The "Mason" glass canning jar was invented and patented in 1858. Jars feature a 2-part cover: an inner flat metal lid and a screw-on ring which holds the lid in place. The canning process creates a partial vacuum as the juice cools, and seals jars until opened later. The sealing lids are used ONCE. The glass jars can be reused many times, making them an ideal container for those who like re-usables and recyclables.
No comments:
Post a Comment